Saturday, 20 September 2014
Banana Bread ( Low Carb , Gluten Free, Keto ) Almond Meal and Coconut Flour
A Low Carb, Gluten Free fix... Made Easy !!
Ingredients
2 Bananas - Ripe
2 Tablespoon Coconut Oil (Or you can use Olive Oil, Butter )
1/2 Teaspoon Vanilla Essense
2-3 Eggs (i used 2 ... 3 would be better)
2 Tablespoon Coconut Cream (Optional)
1 teaspoon Stevia (Optional)
3/4 Cup Almond Meal
1/4 Cup Coconut Flour
3/4 Teaspoon Baking Soda (dash of lemon juice to activate it)
1/4-1/2 cup of broken walnuts
Steps:
- Preheat the oven to 175C
- Mix all the wet ingredients (i used a hand blender )
- Mix all the dry ingredients into the wet mixture
- lightly grease either a muffin pan or breadloaf pan
- bake it for 40-45 mins at 175C or until nice brown on the top and toothpick comes out clean
- Let is rest for atleast an hour ... and you are done , Easy !!
- You can garnish with grated coconut
- Coconut flour is drying to do not use too much .. keep the ratio or almond meal to coconut flour for best results
Tuesday, 13 March 2012
Roasted Asparagus with Garlic and Lemon
A simple easy to do side dish for busy people.
PREP TIME 5 Min
READY IN 15 Min
SERVINGS & SCALING
Original recipe yield: Serves 2, as a side dish
INGREDIENTS
1 packet of asparagus, rough ends trimmed (approximately 300 gms)
Olive oil, as needed
Italian herbs (optional)
4 cloves garlic (finely chopped)
Lemon juice (1/2 lemon)
Pepper, to taste
Sea salt, to taste
DIRECTIONS
2. Drizzle lemon juice over the asparagus. Serve hot!
Note: Use thicker asparagus shoots if they are available to you. It's easier to prevent them from overcooking.
Be careful not to get the garlic burnt. This dish is supposed to be subtle, to replicate what it's like baking the asparagus in an oven. However, with such thin asparagus shoots, it's best to cook them over a pan to prevent them from overcooking.
Healthy Mushroom & Chicken Risotto
I am not a big fan of rice dishes, but was tempted earlier today to try a new recipe. A few days back, I had a bit of craving for that wild mushroom soup (not the creamy milky version you so often get in restaurants) and thought it would be good to try making a mushroom sauce based risotto. I had something similar a couple of years back in a restaurant in Holland Village, and wanted to recreate that taste long forgotten.
PREP TIME 15 mins
COOK IN 1 hour (I used brown short grain rice which I believe takes longer to cook, it should cook in half an hour if you use the normal arborio rice for risottos)
SERVINGS & SCALING
Original recipe yield: Serves 2 as a main course
INGREDIENTS
300 gms of fresh mixed mushrooms (packet comprising of portebello, white and brown swiss mushrooms)
200 gms of chicken breast, sliced
Dry white wine, 1 glass or 1/2 glass, as preferred
Vegetable or fish stock, 1 cube or 1/2 cube, as preferred
1 cup brown short grain rice (rightfully, you should use arborio rice)
2 cloves garlic, finely chopped
1 medium yellow onion, finely chopped
Mixed italian herbs (a dash)
Thyme (optional)
Tarragon (optional)
Spring onions / chives (optional)
Parmesan, 1/2 cup shredded
Olive oil, as needed
40 gm butter (optional)
Sea salt, to taste
Pepper, to taste
DIRECTIONS
2. Add the wine into the mixture over medium heat and stir, until the wine is more or less absorbed and the flavours develop in the rice grains.
3. On the side, make a stock mixture (of maybe 5-6 cups of water with broken chicken/vegetable stock) and stir 1/2 cup bit by bit into the saucepan with the rice. Once the liquid is more or less absorbed, stir in another 1/2 cup. Repeat this process until the rice grains are cooked al dente (firm yet tender to the bite).
4. On the side, separately marinate the chicken slices with sea salt, pepper and a dash of tarragon (or italian herbs). Fry in olive oil in a saucepan till browned and set aside.
5. Next, fry the mushrooms in a little bit of olive oil and butter (optional). Once the rice grains (cooked separately) are more or less cooked, throw the mushrooms mixture (with butter sauce/oil) into the risotto mixture. Continue cooking on medium low heat and keep on stirring.
6. Once done, stir in the shredded parmesan. Garnish with thyme/chopped spring onions and top with the stir fried chicken. Your risotto is ready for consumption!
1. I wanted my risotto to be steeped in the wild mushroom sauce. I used a blender to blend half of the mushrooms very finely. For the other half I had I chopped them roughly, for texture in the risotto. This can be adjusted depending on your reference.
2. Though most risotto recipes call for cream and cheese, I left the parmesan out this time, on request from the husband. I used butter though when I fried the mushrooms, as all cooks know, it gives an instant great flavour to any dish. If you are health conscious, use either butter to fry the mushrooms or top your risotto with parmesan, but not both. Either one is enough to give your risotto a great taste. Still the flavours were fully developed and this is a recipe I will return to again.
3. Keep on stirring - it's very important not to overcook or undercook the rice grains. However, it is not wise to pour too much water into the saucepan at any one time in your bid to cook the rice grains. The technique is to pour in half a cup at a time, and to keep on stirring until most of the liquid water is absorbed, and then re-adding in the next half a cup of water. You have to be there when it's cooking. Making risotto is a laborious process, but well worth it if that's what you are craving at the moment! You need lots of patience.
4. Because I used brown rice (short grain) but not the usual arborio rice, I took around an hour, longer than anticipated. For some reason, it took a really long time to cook. Most risotto recipes wherein the arborio rice is used have a cooking time of 35 minutes.
Monday, 12 March 2012
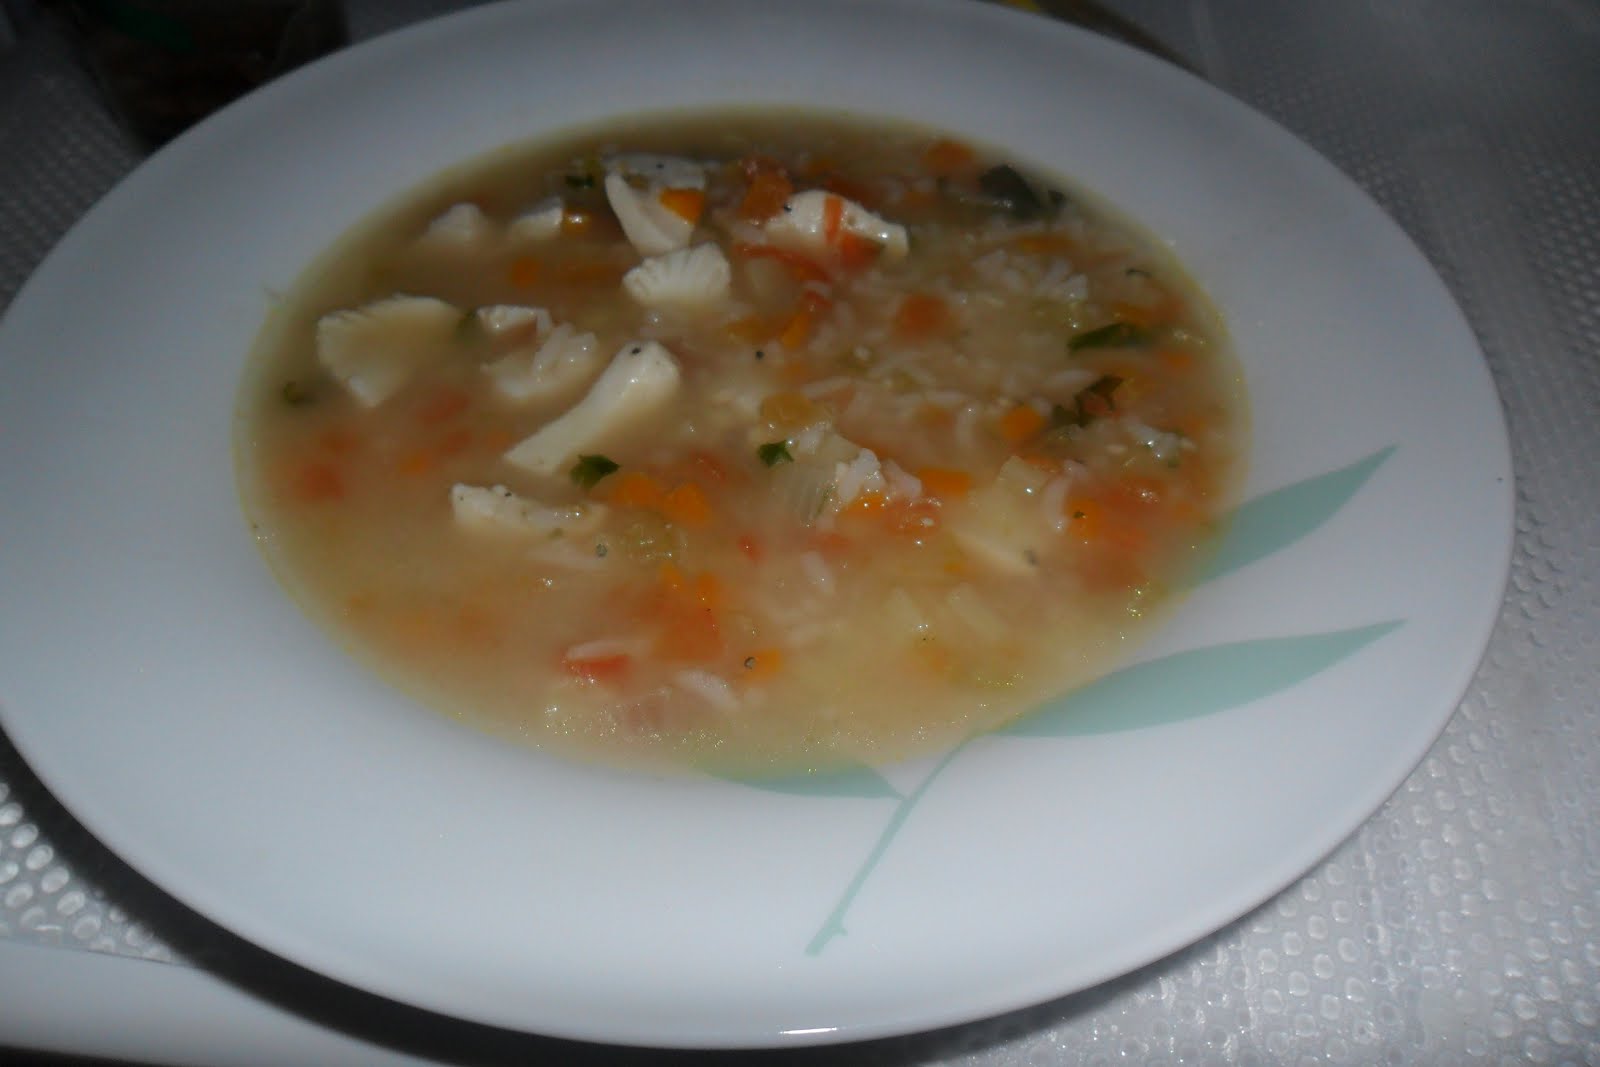
Greek Fish Soup (Psaro Soupa)
This dish was inspired by the homemade fish soup I savoured at Stalactites, a greek restaurant in Melbourne.
PREP TIME Rather long, unless you have the convenience of a hand held blender to finely chop the vegetables
COOK IN 45 mins
SERVINGS & SCALING
Original recipe yield: Serves 4, with bread on the side.
INGREDIENTS
1/3 kg (approximately) of firm fish
1/3 cup olive oil
2 onions sliced (very finely)
2 potatoes sliced (into cubes)
2 carrots sliced (into very small cubes)
1 cup celery chopped
1 clove garlic minced
2 cups tomatoes (1/2 can peeled tomatoes) (chopped tomatoes)
1 wineglass dry white wine (and one for the cook ;))
6 cups water or fish stock
1 bay leaf (optional)
Peppercorns (to taste)
Sea salt (to taste)
1/2 lemon (juice of) (important)
3 tablespoons chopped parsley
1/2 cup rice (semi-cooked, should be no more than equivalent of the total amount of celery and carrots when cooked, since you don't want the rice to overwhelm the soup dish)
DIRECTIONS
2. Thinly slice fish (I used toman (local fish) or any firm flesh fish like snapper will do) & marinate the fish slices with salt and pepper.
3. Separately, in a pan, heat olive oil, fry onion, potatoes, carrots, celery, garlic. Sprinkle water and let it simmer for 5 mins, add tomatoes, wine, water (6 cups with 1 cube stock), bay leave (if you have this) and peppercorns, bring to boil and continue simmering at low heat for around 30 mins. Add drained rice, salt, lemon juice, parsley and fish at the very last step. Bring to boil, lower heat and continue cooking until fish is tender, for about fifteen minutes.
4. Taste the soup - add more lemon juice if more zestiness is desired.
1. I used a Bosch handheld blender to pulse through the vegetables coarsely - this saved a lot of time on preparation even though the vegetables were not evenly chopped (not quite possible with a simple handheld blender). Generally, the soup should have the appearance of a summer vegetable soup, but with fish slices and a zesty punch to it.
2. For a less heavy meal option, leave out the rice and simply have the soup on its own.
Monday, 29 August 2011
Spicy Garden Vegetable Pasta with Grilled sausage
PREP TIME 15 Min
COOK TIME 15-20 Min
READY IN 30 Min
SERVINGS & SCALING
Original recipe yield: 4 servings
INGREDIENTS
250 gm Pasta - Spagetti or Linguine (can be substituted with fusilli)
1 Onion Chopped
1/2 cup Garlic Chopped
3 Peppers - Green Yellow and Red, sliced
2 Tomatoes - finely chopped (can be substituted with cherry or sundried)
1 Carrot - sliced
2 cups mushrooms - sliced (optional)
1/2 cup wine - i used red for this one (if it's not worth drinking, it's not worth using in your cooking)
Mixed Italian Herbs, Red Chili Powder or Chili Flakes, Course Black Pepper
3 tblspoon olive oil (extra virgin)
DIRECTIONS
1. Cook pasta al dente (follow usual instructions on the pasta pack)
2. Saute the onions, garlic (2-4mins) in the olive oil - add the rest of
the ingredi. Tomatoes, mushrooms, etc
3. Add in the spices, and wine , cook for about 5-10 mins covered ( until the tomatoes have disintegrated)
4. Throw in the pasta - mix well and serve
For the sausage - Grill as desired.
Sunday, 24 April 2011
Mushroom Fried Rice
Vegetarian version of the Chinese Fried Rice
PREP TIME 10 Min
COOK TIME 15 Min
READY IN 25 Min
SERVINGS & SCALING
Original recipe yield: Serves 2 as a main course
INGREDIENTS
Sliced fresh button mushrooms, 1 packet
300gms of mixed vegetables (finely cubed corn, peas and carrots)
3 eggs beaten (use 3 egg whites and only 1 yolk for healthier version)
Cooked rice (from 1/2 cup of uncooked basmati rice or any other white rice), left overnight in the fridge
1/3 ginger, finely chopped
1 medium onion, diced
Pepper
Salt
Soya sauce
Cooking oil
Belachan or other chilli sauce to taste (if desired - optional)
Spring onions to taste (if desired - optional)
DIRECTIONS
2. Heat up the oil in the frying pan. Use around 2-3 tablespoons of oil at least. Fry the onions until translucent. Add some ginger and saute for a while. Add the beaten eggs mixture. Break up the eggs mixture and add a pinch of salt and pepper.
3. Add the mushrooms and stir fry until cooked. Sprinkle some water if you do not have enough oil and do not want to use too much oil. Next add the cooked mixed vegetables. Mix well. Add more salt and pepper to taste. If you have soya sauce, add in a little as well.
4. Mix the separated rice (before adding into the wok you should break up the clumps so the rice grains are nicely separated) into the mixture of vegetables and mushrooms. Keep on low heat and mix well. Add more salt, pepper and chilli sauce (or belachan) to taste if desired. Otherwise you can switch off the fire once the rice is well mixed and not too moist.
5. You can garnish with spring onions if you wish.
TIPS
Note: Onions help to give this vegetarian version a very good flavour. Add more onions if that's your thing. Just make sure it's finely diced!
Instead of mixing the belachan or chilli sauce, just have the belachan or chilli sauce served on the side.
Handmade Noodle (or rather Flour Cakes), more commonly known as Mee Hoon Kueh / Kway
Comfort food for the soul. Nothing beats homemade shaped mee hoon kueh over the flat squarish ones you get out of a machine outside.
PREP TIME Rather long, if you want to make a good broth
COOK IN 30 Min
SERVINGS & SCALING
Original recipe yield: Serves 2 as a main course.
INGREDIENTS
1 bowl of dried shitake mushrooms, washed and soaked for at least an hour
Anchovies, a handful or as much as you wish
Fish balls, around 6
Chicken fillets, 250 gms
Plain or multi purpose flour, 300 gms
Tong Cai (Preserved vegetables), a handful
Green leafy veges, chye sim or spinach, half a packet
Pepper, to taste
Salt, to taste
Ikan bilis stock, 1/2 cube (Optional)
DIRECTIONS
2. Set aside and slice the mushrooms that have been soaked. The water used to soak the anchovies can be added to the flavourful stock created earlier from the boiling of the anchovies. The stock made from boiling anchovies and soaking the mushrooms create a very rich soup.
3. Slice chicken and season with salt and pepper for a short while (10 - 15 mins). Boil the soup and throw the chicken inside to cook.
4. In a bowl, throw in 300gms of multi purpose flour. Add tong cai or preserved vegetables into the flour. Sprinkle some water, bit by bit. Try kneading the dough and mixing with the tong cai thoroughly. If it is too wet, add more flour. If it is too dry, sprinkle a little bit of water. Continue until you knead to get a ball of dough that is of decent consistency (not too sticky). Let the ball of dough settle for a while (say 15 mins).
5. Rub the ball of dough (presumably to be still slightly sticky with some flour so it doesn't stick too much. Put it on a dry chopping board or surface coated with some flour. Either use a rolling pin or your hands to flatten the dough. Use a knife to cut vertically into strips.
6. Using your hands, take a reasonable sizeable piece from each strip and flatten with your finger tips. Throw into the boiling soup, one by one. Stir with a ladle to prevent pieces from sticking together. You can estimate the size of each mee hoon kueh by your own preference. Take just a bit of dough if you prefer small thinner strips, more dough if you prefer thicker bigger pieces of mee hoon kueh.
7. Add vegetables and fishballs. Add stock or salt to taste, if preferred. Add some pepper to taste.
1. You can make mee hoon kueh without preserved vegetables (tong cai), just that that ingredient makes the mee hoon kueh tastier. The mee hoon kueh served outside is usually w/o this ingredient.
2. Instead of boiling anchovies in water for a natural tasting stock, just add more ikan bilis stock (up to a cube) and salt if you do not have time to make the stock.
3. Instead of using fishballs, some people may prefer to use minced pork which is fine as well. Add the minced pork in towards the end.
4. You can also shallow fry anchovies and serve on top of the mee hoon kueh soup once it is ready.
5. You can also crack an egg over the mee hoon kueh as is the case when you are served this dish outside.
Simple steamed fish
Simple & tasty steamed fish.
PREP TIME 10 Min
COOK TIME 15 Min
READY IN 25 Min
SERVINGS & SCALING
Original recipe yield: Serves 2 as a main course
INGREDIENTS
2 fillets of red snapper / cod (or any other non-fishy fish)
Mirin, enough to rub over the surfaces of the fish
Spring onions, chopped or cut into 2 inch pieces
Sea salt
Pepper
Garlic, finely chopped OR 1 tablespoon garlic paste
Ginger, finely chopped OR 1 tablespoon ginger paste
Sesame oil, drizzle
Chilli powder, optional
DIRECTIONS
2. Boil water in a pot. Arrange the fish in a bowl (or other appropriate saucer for steaming). Place the spring onions over the fish and drizzle some sesame oil over it.
3. Once water is boiling, lower the bowl into the pot carefully and close the pot with a lid.
4. For fish fillets of usual thickness, after 15 mins, you can test whether it's cooked by putting a fork through. If the fork comes out clean, the fish is cooked. Otherwise, if the fork has sticky or rubbery residue, put the lid back on and continue cooking until it's done.
When it's cooked, serve with white rice and some side vegetables.
TIPS
Note: Instead of putting ginger, for a more western flavour, you can sprinkle some italian herbs as well on the fish as part of its marinate. I have tried it before and it tastes equally heavenly!
You can add some chilli powder into the marinate for some slight kick. Be careful not to overpower the taste of the fish though. Chilli lovers can also put a couple of red chillis with slits on the fish before steaming.
I personally prefer to use cod instead of snapper, as it's easier to serve it without marination. Cod has a very nice flavour (so does red snapper, but cod wins hands down) and is suited for people who are adverse to the fishy taste of certain types of fish.
Monday, 18 April 2011
Healthy Bitter Gourd & Fish Bee Hoon Soup
Good when you are craving a simple home cooked meal and something soupy. A healthy, 'cooling' dish in the chinese sense, due to the nutritional value of bittergourd.
PREP TIME 30 Min
COOK IN 30 Min
SERVINGS & SCALING
Original recipe yield: Serves 2 as a main course.
INGREDIENTS
1 bittergourd, sliced
Fish slices (Catfish or any firm fish without overpowering fishy taste)
Bee Hoon, 2 servings, soaked and drained
Spring onions or coriander, to garnish
Pepper, to taste
Salt, to taste
One pinch of preserved vegetables (tong cai), to taste
Ikan bilis or chicken stock cube, 1/2
DIRECTIONS
2. Season fish slices salt and pepper for at least half an hour.
3. Boil water and a pinch of preserved vegetables in a pot. Once water boils, add bitter gourd. Cook till preferred level of thoroughness (some prefer the slightly raw crispy taste, while others prefer the softer and blander bittergourd). Add in bee hoon. Stir in stock. Add salt and pepper to taste.
4. Garnish the cooked soup with some coriander or spring onions.
TIPS
For those who have a bottle of mirin at home, you can add mirin to your fish to remove any residual fishy taste. It also gives a wonderful flavour to soup.
Saturday, 16 April 2011
Stir Fried Bee Hoon (Mee Hoon)
A basic asian meal. The recipe has been adapted for the health conscious.
PREP TIME 10 Min
COOK TIME 20 Min
READY IN 30 Min
SERVINGS & SCALING
Original recipe yield: Serves 2 as a main course
INGREDIENTS
Bee Hoon, 1/2 packet (or 2 servings), soak in water for a short while
6-8 celery stalks, chopped into thin slices
Garlic, 3-4 cloves (finely chopped)
Dried mushrooms, soaked in water for at least an hour, 1 small packet of around 100gm
1 chicken breast, sliced
Fish cake, 1 packet
Chilli powder, to taste
Ikan bilis stock, non-msg version, half cube
Cooking oil
Chilli padi, to taste
Salt, to taste
Soy sauce, to taste
Pepper, to taste
DIRECTIONS
2. Next, heat up the oil on low heat in a wok or pan. Fry the garlic and then add in the celery before the garlic browns. Add the mushrooms and the fish cake. Sprinkle a little bit of water to prevent over-use of oil if necessary. Add some salt and pepper, to taste.
3. Break up the ikan bilis stock and add a little bit of water to make a slight paste. Toss it over the soaked and drained bee hoon (uncooked). Mix well.
4. Once the mushrooms are cooked and the celery is soft enough to your liking (depending on whether you prefer it crunchy, we prefer it slightly overcooked), toss in the bee hoon. Mix well on low heat. If there is not enough water, be careful not to pour but just drizzle / sprinkle a little bit and continue mixing and turning until the bee hoon is cooked to a nice consistency and the water is soaked up.
5. Add chilli paddi if you prefer a spicy dish. Toss in your chicken at the end.
Note: How long you soak the bee hoon depends on how thick/what brand of bee hoon you buy. We personally like a thicker bee hoon to fry. For soup based dishes, you can use the thinner type. Usually the prep time (10-15 mins) is enough time to soak the bee hoon, however if it is thicker, at the final stage, when you toss in the bee hoon to mix with the ingredients, you may have to keep it on low heat and mix for a longer period of time until it is properly cooked and the bee hoon is not too soggy or dry. Sprinkle water sparingly.
You can use seafood rather than chicken if you prefer.
Homemade Chicken Rice
The chicken rice is a very cheap & popular dish served at local food centres. It is tasty and suits most palates. Definitely a dish to recommend to visitors to Singapore or Malaysia who are not all that used to Asian cooking. The food centre version is usually portrayed to be delicious yet sinful, here we teach you how to make a healthier version at home. It is not hard to make at all!
PREP TIME 15 Min
COOK TIME 35 Min
READY IN 40-50 Min (depends on how good you are at multitasking ;))
SERVINGS & SCALING
Original recipe yield: Serves 2 as a main course
INGREDIENTS
1 small frozen or fresh chicken
Half a packet of chye sim or any other leafy vegetables, washed and cut
2 baby carrots, sliced
1 onion, sliced into rings
1 cup rice
4-5 cloves garlic, finely chopped
Ginger, finely chopped OR Ginger paste, to taste
Pepper
Sea Salt
Soya sauce
Chicken stock, non-msg version (half a cube)
Sesame oil (a drizzle)
Cooking oil
Spring onions or coriander (a handful) for garnish
Cucumber (optional)
Chilli sauce (optional)
Mirin (optional)
DIRECTIONS
2. Boil water in a pot. Once the water boils, you can throw the chicken into the boiling water. Mine took around 20 minutes to cook. Just test by poking through the meat with a chopstick, if it comes out clean, your chicken is cooked. Fish out of the water and set aside.
3. While the chicken is cooking, you can heat oil in a pan. In this case, I used olive oil, a healthier alternative and because there is no heavy frying involved. Stir fry the garlic followed by the ginger (or ginger paste). Put the stir fried garlic and ginger together the washed rice in the rice cooker. Break into small pieces the half cube of the chicken stock and place into the mixture. Add a little bit of water and cook rice as per the norm.
4. While you leave the chicken to cool, the soup stock made naturally can be used to make a light vegetable soup. Throw onions and carrots (which take a longer time to cook but which add a delicious sweet flavour), followed by chye sim or any other leafy vegetables. Add salt and pepper to taste.
5. Once the chicken cools, cut the chicken up with a knife or a big pair of scissors. Add sesame oil, soy sauce, sea salt and pepper (all to taste) and rub all over.
6. Garnish the chicken with coriander or cucumber if you have that.
7. Once your rice is ready, serve plain, garnished with spring onions, additional ginger paste or with chilli sauce. Together with the boiled but very tasty chicken and vegetable soup, it comes together as a very hearty meal indeed.
Note: In cooking the rice, if it is in time, the chicken broth from boiling the chicken instead of water can be used instead for a richer chicken flavour.
More ginger paste or chopped ginger can be used if you love that gingery taste, which we do.
Be careful not to overcook your chicken, otherwise it will not be moist.
We did not use chilli sauce as it is too much trouble to make for one meal. There was no need for it either. The dish was really satiating on its own. If you are one of those who needs the chilli sauce, perhaps you can get the bottled version for your convenience. Or try making it and share with us your recipe.
Enjoy! Xox (We had the rice and the soup served separately and did not want to take pictures as we were just too famished, our apologies!)
Sunday, 4 October 2009
How to make pesto sauce
You may wish to make your own pesto sauce, which I have done before. You can actually grow your own herbs at home, Cold Storage occasionally sells the potted basil plants. I am pretty tempted to take one home and try my hand (not so green) at it.
PREP TIME 10 mins
SERVINGS & SCALING
Original recipe yield: Serves as a condiment
INGREDIENTS
Fresh basil leaves, a packet / a large handful
Pine nuts, a handful
Pecorino cheese, a handful
Garlic cloves, 2
Salt and pepper, to taste
Extra virgin olive oil, 1/2 cup
DIRECTIONS
TIPS
Note:
(a) Use a food processor to blend everything together instead of a mortar and pestle.
(b) Instead of pecorino cheese, I used shredded mozzarella cheese (those sold in a packet) instead and it worked out fine.
(c) Once, I didn't have pine nuts and used walnuts instead and it worked out fine as well.
(d) Be creative with substitutes you never know what you get!
(b) For those who are privy to the magic of mirin and have a bottle at home, you can add in a tbsp when you are marinating your chicken breasts. It gives the stock a delicious flavour. I recommend though if you use mirin, you can forgo the salt in your chicken breasts.
(c) If you do not want that slightly creamy texture or for the diet conscious, you can skip the mayonnaise.
Simple chicken macaroni soup
Good when you are craving a simple home cooked meal and something soupy, or when you are at home nursing a flu.
PREP & COOK TIME 20-30 Min
READY IN 30 Min
SERVINGS & SCALING
Original recipe yield: Serves 2 as a main course.
INGREDIENTS
2 cloves, finely chopped garlic (optional)
2 chicken breasts, deskinned and deboned
Macaroni (Elbow pasta), 2 cups (approximately 1/2 of the standard packet)
Spring onions, to garnish
Paprika / Chilli powder
Pepper, to taste
Salt, to taste
Chicken stock cube, 1/2
1 medium onion, slice into rings (optional)
2 carrots, chop coarsely (optional)
DIRECTIONS
2. Throw in the macaroni pasta and boil. Taste the soup, add water / salt / pepper as required.
3. At the side, on a heated saucepan, saute the small garlic pieces until slightly browned. Add some chilli powder to the mixture if required.
4. Garnish the cooked macaroni soup with the fried garlic and spring onions.
TIPS
Note:
(a) For those who are privy to the magic of mirin and have a bottle at home, you can add in a tbsp when you are marinating your chicken breasts. It gives a wonderful flavour.
(b) Other than the carrots and onions, you can add in sweet corn / peas / radish etc. if you want the soup to be more naturally flavoured with the sweetness of these vegetables
Chicken Tomato Pesto Pasta
Italian food gourmet style at home - my husband is a fan of pesto pastas, I had set out to make pesto pasta for him one evening. Unfortunately when I went to Cold Storage, the fresh basil leaves (to make the pesto sauce) was retailing at 4 dollars plus. Instead I got a premade pesto powder (McCormicks). There is also premade pesto sauce (more liquified in a glass bottle) which I wanted to get but didn't see that day, hence I got the pesto powder instead, since it was cheaper (and more convenient!) than getting the fresh basil leaves and other ingredients to make the pesto sauce separately. The result was a delicious nicely flavoured pasta - try it at home - you will not be disappointed. Such simple ingredients and yet such a scrumptious plate of pesto pasta. As we are not great photographers, the pictures don't do the dish any justice!
PREP TIME 15 Min
COOK TIME 10 Min
READY IN 25 Min
SERVINGS & SCALING
Original recipe yield: Serves 2 as a main course.
INGREDIENTS
2 chicken breasts, deskinned and deboned
Pepper, to taste
Salt, to taste
Penne pasta, 1/2 packet
1 medium onion, finely chopped
4 tomatoes, finely chopped, drained of excess juice and pulp
Mayonnaise, 1 dollop (full tablespoon)
McCormicks pesto sauce mix, 1/2 packet
Hazelnut oil (can be replaced with olive oil)
DIRECTIONS
2. Cook the penne pasta in boiling water until al dente. Drain and set aside.
3. In a heated wok, add in two tablespoons of hazelnut oil. Throw in the onion sand stir fry until the onions become translucent. Throw in the tomatoes. Saute for a while. Add in the pesto powder (or sauce if you bought the sauce version) and the 1/3 cup of chicken stock you saved earlier. Mix well. Add in one dollop of mayonnaise - this replaces sour cream in some pesto pasta recipes - you notice the sauce becomes slightly thicker.
4. Throw in the pasta and mix well. Have some pepper on top before serving. Viola it's done!
TIPS
Note:
(a) The hazelnut oil (gourmet organic and bought from a specialty store - Crescendos) gave the pesto pasta a very rich intense flavour. I am aware most households may not have this - you can still create a delicious recipe using olive oil (without the subtle nutty flavour and aroma of course).
(b) For those who are privy to the magic of mirin and have a bottle at home, you can add in a tbsp when you are marinating your chicken breasts. It gives the stock a delicious flavour. I recommend though if you use mirin, you can forgo the salt in your chicken breasts.
(c) If you do not want that slightly creamy texture or for the diet conscious, you can skip the mayonnaise.
Sunday, 6 September 2009
Healthy Grilled Fish with Baked Vegetables
Grilled fish fillet with baked vegetables - choice for the diet-conscious and easy to prepare.
PREP TIME 10 Min (excluding marination time)
COOK TIME 15 Min
READY IN 25 Min
SERVINGS & SCALING
Original recipe yield: Serves 2 as a main course.
INGREDIENTS
2 huge fish fillets (dory or sutchi or any other similar tasting fish)
1/2 cup of orange juice OR pineapple juice
1 medium sized onion, sliced into rings
1 medium carrot, chopped
1 green pepper, cut into medium sized pieces
1 tsp turmeric powder
dash of pepper
dash of paprika / chilli flakes (optional)
a pinch of salt (approximately 1 tsp)
a wee bit of olive oil
italian mixed herbs, 2 tbsp
DIRECTIONS
2. Preheat your oven at 220 degree Celsius for approximately five minutes beforehand. On the baking tray which is covered with aluminium foil, arrange the green pepper / carrots on the bottom so that they create a support for the fish fillets. This prevents the fish from becoming too soggy due to the excess liquid marinate. Arrange the onion rings over the fish fillets. Pour the marinate over the onions, fish and vegetables on the baking tray. Bake for approximately 12-15 mins and check with a fork to see if fish is cooked.
TIPS
Note:
(a) Many grilled fish recipes suggest using orange juice as a marinate, and for lime juice to be squeezed over once the fish fillets are cooked. I had no limes and orange juice left, and used pineapple juice instead (with a slight tangy taste in place of lime) - it worked out fine!
(b) I don't like my fish fillets to look pasty white, hence I used turmeric for some colouring. You can leave that out if the colouring is not an issue with you.
(c) goes well with the aglio olio
Spaghetti Aglio Olio Prawn
I always loved the spaghetti aglio olio from Borders cafe - it's a simple dish really, but i enjoy the taste, more so with the fresh huge prawns the pasta dish usually comes with. Borders cafe is pretty generous with their portions, and I am a sucker for portions. On a lazy Sunday afternoon, I tried to re-create the same dish with whatever ingredients I already have in the refrigerator.
PREP TIME 10 Min
COOK TIME 10 Min
READY IN 20 Min
SERVINGS & SCALING
Original recipe yield: Serves 2 as a main course.
INGREDIENTS
Spaghetti, 1/2 packet
1 tbsp salt (or less to taste)
chilli flakes / paprika, to taste
2 cloves garlic, finely chopped
Prawns, deshelled and deveined, a handful
2 tbsp basil leaves, chopped (fresh preferred) / OR the same amount of mixed Italian herbs
Red cooking wine, 1 tbsp (optional)
2 tbsp extra virgin olive oil
DIRECTIONS
2. Dribble the olive oil into the frying pan. Once oil is heated, throw the garlic in and saute for a couple of minutes (before it gets too brown). Next throw in the herbs / basil leaves and the paprika / chilli flakes. Stir frying the herbs / spices ensures that the flavours are infused with the oil. Saute for a bit.
3. Throw in the prawns and saute. Now at this juncture, if you are not into using too much oil, yet you find the stir fried mixture too dry, and you happen to have some leftover wine (in my case I had red cooking wine), you can sprinkle a little bit over the mixture and toss well. This helps to prevent the herbs / garlic / chilli from sticking too much to the pan.
4. Add in the spaghetti and toss well. Add salt to taste. Mix well.
5. Serve with a slight sprinkle of basil / herbs and chilli flakes on the top. Tastes better and prevents the dish from looking too dull.
TIPS
Note:
(a) Use larger, juicier prawns if you are a prawn lover. Duh! In my case (because I am lazy and I am sure many of you working women out there are as well), I usually have a packet of frozen cooked (or uncooked) deveined and deshelled shrimps in the fridge for my convenience. When cooking dishes like the tom yum beehoon in my previous post etc (see: http://cooking.tanejas.com/2009/07/tom-yum-bee-hoon-bi-hun-rice-vermicelli.html), fried rice or any pasta dish, I can conveniently dethaw these prawns to use. Taste wise, it ain't too bad still pretty juicy and (tastes) fresh. It really cuts short the preparation time!
(b) I didn't have basil so I used italian herbs (mixed) which has some amount of basil, rosemary, thyme and other italian herbs for that matter. Still tastes good.
Saturday, 5 September 2009
Homemade Bruschetta
Homemade Bruschetta - The lazy cook's way, a non-fussy recipe with simple home ingredients.
PREP TIME 10 Min
COOK TIME 10 Min
READY IN 20 Min
SERVINGS & SCALING
Original recipe yield: Serves 2 as an appetizer.
INGREDIENTS
1 tbsp salt (or less to taste)
1 tbsp pepper
1 tbsp sugar (optional)
2 tbsp chopped basil leaves
2 cloves garlic, finely chopped
2 large chopped tomatoes
1/2 cup extra virgin olive oil
Around 4 slices of white bread
DIRECTIONS
2. Mix salt, basil, pepper, garlic and the olive oil. Toss the mixture over the tomatoes and mix well. Try to refrigerate for at least half an hour in the freezer, these will allow the tomato and basil flavours to blend better.
3. Great to go on baguette loaves, but in my case, we simply use the usual bread slices (and removed the crust).
4. Spoon a moderate amount of the bruschetta mixture on the bread and toast in an oven.
TIPS
(a) There are many variations of preparing homemade bruschetta. Once can also toast the bread beforehand, and just spoon the cold bruschetta mixture on top before serving. In my case I preferred to toast the bruschetta alongside with the bread (which doesn't take long to toast anyway).
(b) I prefer not to use sugar, you can use though as it's in most traditional recipes.
(c) It will be more authentic of course if you serve your bruschetta on baguette slices instead of the squarish bread slices as I did for mine, but there is really no compromise taste wise!